ERP Enablement
This section provides instructions on configuring the NetSuite instance for SFTP based transmission method.
Pushing the HighRadius Connector Bundles
The following are the prerequisites for pushing bundle to another account:
-
Bundle owners (product team) can push their bundles to any NetSuite account.
-
Netsuite account ID and environment extension of the destination account.
-
Destination account administrator to accept the bundle installation request.
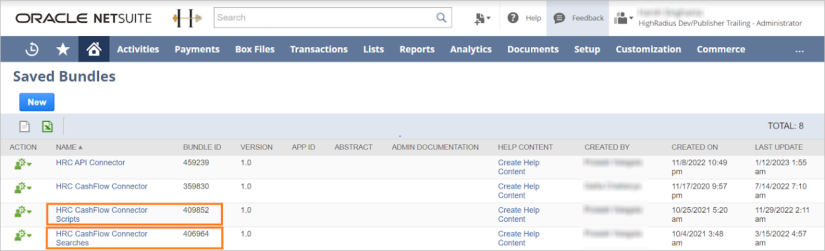
To find the HighRadius connector, follow these steps:
-
Log in to NetSuite and navigate to Customization > SuiteBundler > Create Bundle > List.
-
Search for HRC CashFlow Connector bundle.
|
|
Note Every bundle has an ID associated to it. HRC Cashflow Connector search has been made public, but ensure that the bundle IDs are installed at the clients end. |
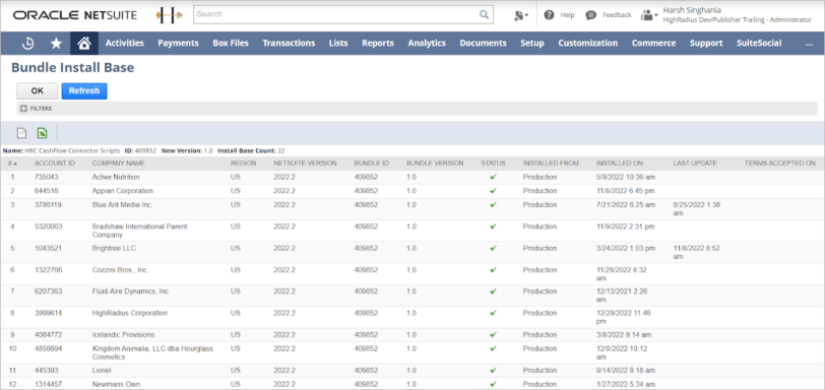
Accessing Bundle Install Base
The bundle install base enables to access all the NetSuite Client accounts where the bundle is installed. To access a bundle install base, follow these steps:
-
Navigate to Customization > SuiteBundler > CreateBundle > List.
-
Search for HRC CashFlow Connector Scripts and click Show Install Base in the action list for the bundle.
Installing a Bundle
To install bundle, follow these steps:
-
Navigate to Customization > SuiteBundler, and click Search and Install Bundles.
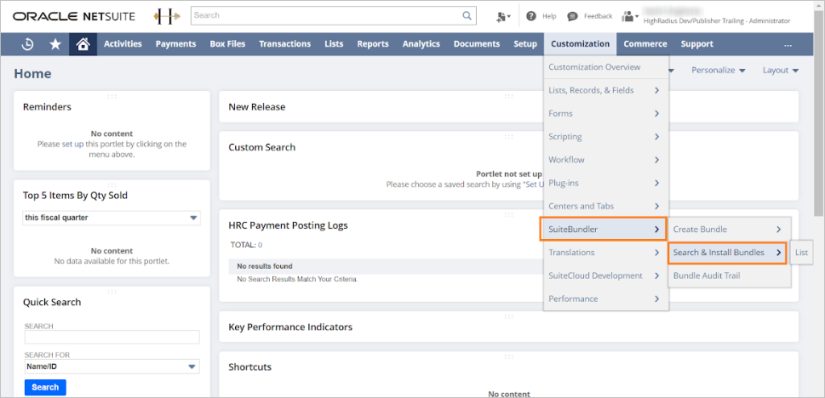
The Search & Install Bundles screen is displayed.
-
Type Radius in the KEYWORDS field and click Search.

-
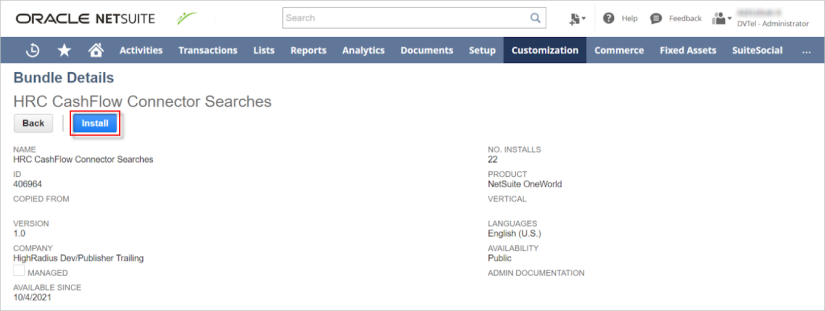
Click the required bundle to access the Bundle Details page and click Install.

Note
The Install option is displayed only if the availability is set from the HighRadius account.
The Preview Bundle Install screen is displayed with the details of the HighRadius connector.
-
Click Install Bundle.
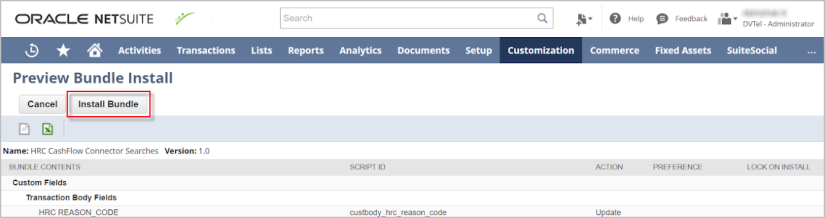
A pop-up window is displayed prompting to confirm the installation.
-
Click OK to proceed.

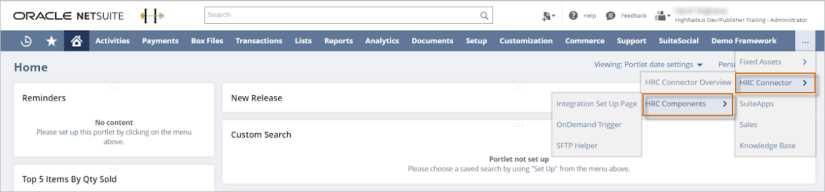
HighRadius Connector Overview
Users can access the HighRadius connector on the top banner after the bundle is installed. It contains the following components:
|
|
Note The configurations mentioned below are a one time activity in each instance. The following configurations must be executed in the production instance as well, including all components setup, and any saved search modifications. |
Click the  icon at the top-right corner and navigate to HRC Connector > HRC Components.
Integration Setup Page
Refer to the following example Integration Setup Page.
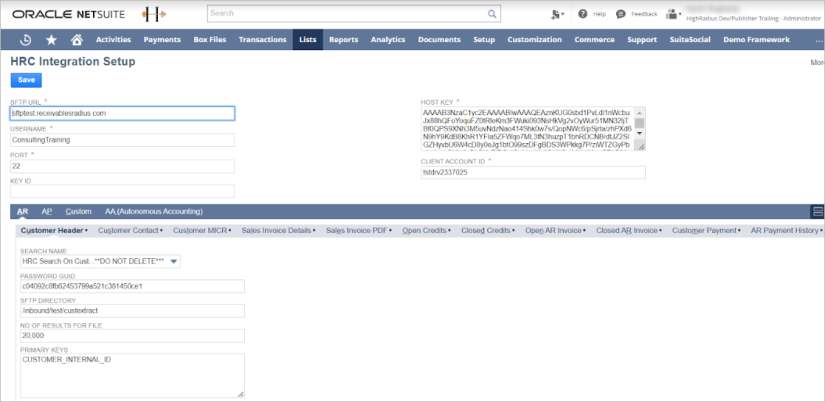
The following table lists the Integration Setup Page components.
|
Field Name |
Description |
|
SFTP URL |
SFTP to which the files must be transmitted to, or received from. |
|
Username |
Username of the SFTP. |
|
Port |
Standard SFTP protocol port (22). |
|
Host Key |
Encrypted password of the SFTP, which is generated from the SFTP Helper screen. |
|
Search Name |
This saved search is triggered when the corresponding extract is generated. |
|
Password GUID |
Encrypted password of the SFTP which is generated from SFTP Helper screen. |
|
SFTP Directory |
Folder in the SFTP where the file is placed. |
|
NetSuite Folder |
This is the File Cabinet folder in Netsuite. This is equivalent to cloud storage provided by NetSuite. The space is limited and it is recommended to keep cleaning up the folders. |
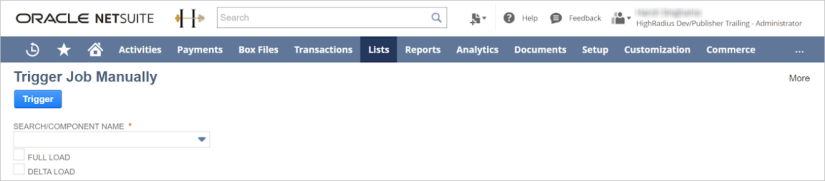
On Demand Trigger
The following table lists the on demand trigger page components.
|
Field Name |
Description |
|
Search Name |
Data that must be extracted. |
|
Username |
This depends on the type of data that must be extracted. |
|
|
Note If FULL LOAD or DELTA LOAD is not selected, the default selection is FULL LOAD. This page enables to extract any data from NetSuite on an ad-hoc basis. |
SFTP Helper
The SFTP Helper page is a one time setup per client.
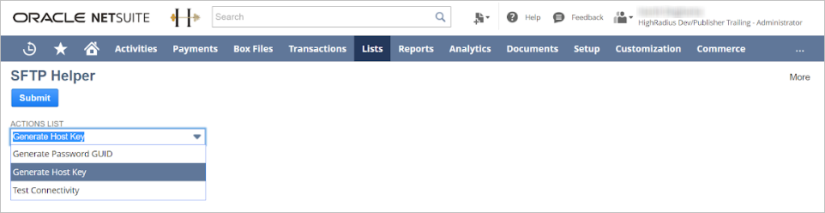
The following table lists the possible actions.
|
Field Name |
Description |
|
Generate Host Key |
The key generated here is used in integration setup page. |
|
Generate Password GUID |
The GUID generated here is used in integration setup page. |
|
Test Connectivity |
You can validate if Netsuite is able to connect to the SFTP or not. |
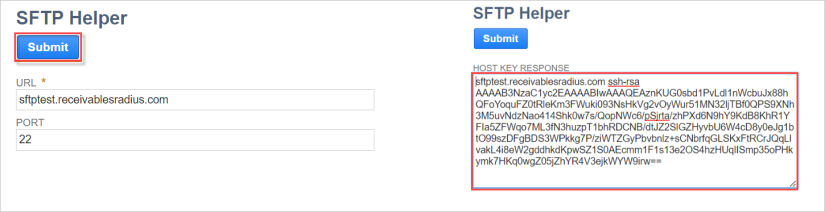
Generating Host Key
To generate the host key, follow these steps:
-
Navigate to SFTP Helper > Generate Host Key and provide the details in the fields listed in the following table.
Field Name
Description
URL
SFTP URL to which Netsuite has to connect.
Port
The default value must be 22.
-
Copy the generated key and use it in the Integration Setup page.
Note
The generated key is the text available after ssh-rsa.
Generating Password GUID
To generate password GUID, follow these steps:
-
Navigate to SFTP Helper > Generate Password GUID. The following table lists the details of the fields.
Field Name
Description
Restrict to script IDs
Script IDs from the deployment page of the components in the bundle.
Note
You can provide multiple script IDs with , as a separator. However, 90 characters is the limit in this field.
Restrict to Domains
SFTP URL to which NetSuite has to connect.
-
Click Submit. A screen displays prompting you to enter the SFTP password.
-
Enter the password and click Submit. The password GUID is generated and can be used in the Integration Setup page.

Note
The ability to directly provide SFTP password is not supported in NetSuite. It uses password tokenization to prevent scripts from having access to user credentials.
Receiving Script IDs
To receive script IDs, follow these steps:
-
Navigate to Customization > Scripting > Script Deployments.

A new page with all the deployments is displayed.
-
Identify the HEX-NS related deployments.
Note
All HighRadius deployments have HRC as prefix.
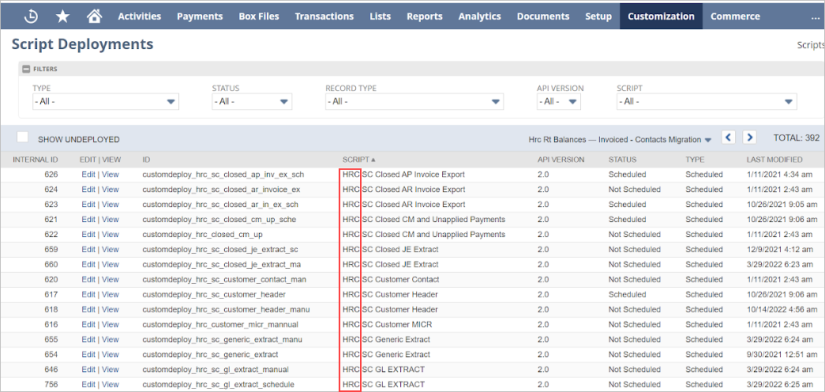
The IDs containing hrc in them must be used in the Generate Password GUID screen in SFTP Helper.
Scheduling the Bundle
This section provides the instructions on scheduling the bundle.
Deployment Page
-
Navigate to Customization > Scripting > Script Deployments.
-
Search for all the deployments with script name with HRC as a prefix. The following table lists the major components.
Field Name
Description
Status
Validates if the job is scheduled or not.
Type
Validates if the job can be scheduled or does not have that flexibility.
Scheduling a Script
To schedule a script, follow these steps:
-
Navigate to the Script Deployment page.
-
Click Edit against the script that must be scheduled.
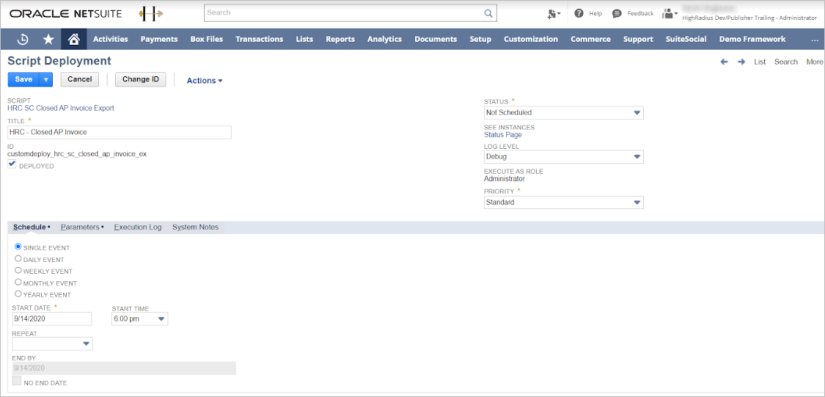
Validating the Script Status
To validate the script status, follow these steps:
-
At the top half of the script deployment page, change the status of the script to Scheduled and do not make any other changes.
-
At the bottom half under the Schedule tab, select the required frequency to extract the data for the corresponding script.
-
Click Save.
-
Select No End Date checkbox.
-
Repeat the same procedure for all the scripts which must be executed on a scheduled bases.
Once the script is scheduled, the status of the script changes to Scheduled in the deployment page.

Saved Search Configurations
A search with a standard set of fields is created for every data extract and saved in NetSuite. If data must be extracted for a particular extract, the fields mapped in the saved search are pulled into the file.
-
Navigate to Lists > Search > Saved Search to access all the saved searches in NetSuite.
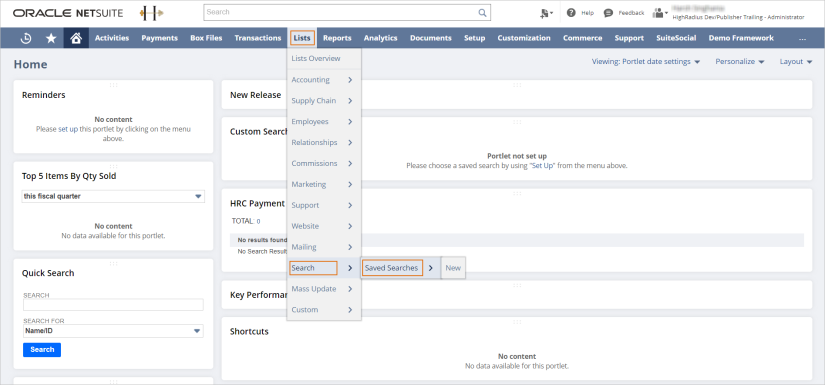
-
Identify the saved search created for HighRadius extracts.

Hint
The name starts with HRC.
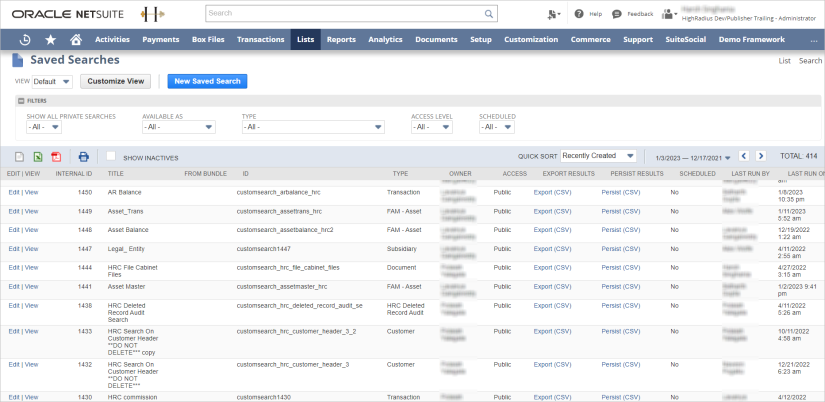
If additional data field from the pre-defined set of fields must be extracted from NetSuite, the saved search must be updated. Once the search is updated, the additional fields flow in the file. This avoids changes in connector code.
-
Click Edit to update the saved searches. The following table lists the key subtabs.
Field Name
Description
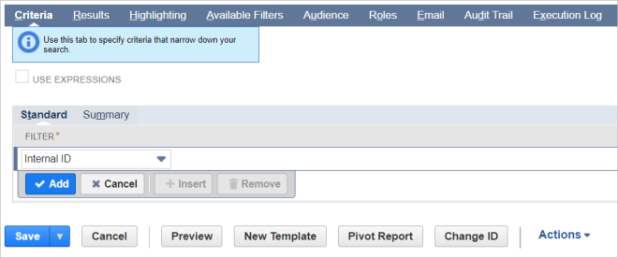
Criteria
To narrow down the search. For example, extracting data only for country (USA).
Results
Contains list of all the fields for extraction.
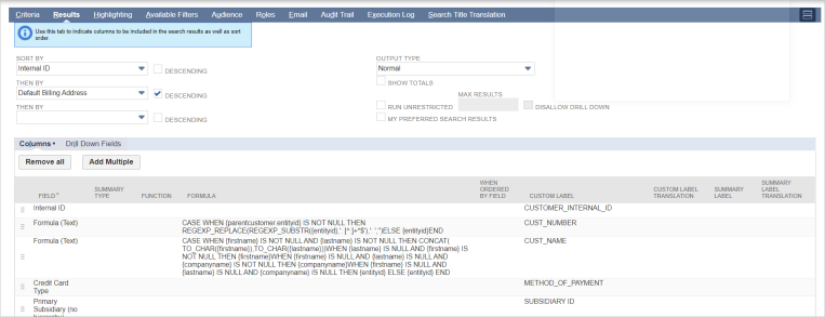
-
Click any of the existing fields to update the mapping. The file column headers can also be changed.
-
If a new field must be mapped, click the Insert icon; and if an existing field must be deleted, click the Remove icon.
-
Provide value in the custom label to receive the required header in the file.
-
Click Save. The subsequent script runs and fetches the fields from the updated saved search.
